Silhouette photography is a technique that uses strong backlighting to turn the subject into a black outline. It highlights the subject's form through simple lines and contrast between light and dark, creating a sense of storytelling and artistic atmosphere. It is a visual art, an artistic image that emphasizes outlines, which can express a simple concept or idea. It can not only capture strong visual contrasts but also convey the artistic conception of the picture through outlines.
Photographers place the subject in a bright or brightly colored background, making the subject (or non-subject) appear as a black shadow.
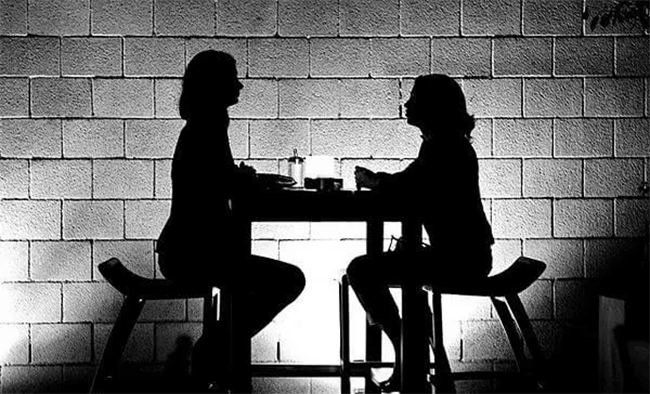
Silhouettes are best suited for subjects (or non-subjects) with unique shapes, most commonly used to show the outline of a human face or body. Secondly, the background should be bright and regular. If environmental conditions such as light are appropriate, this effect can be created in a studio. If the subject is completely dark without any details, the photo will look simple and full of mystery.
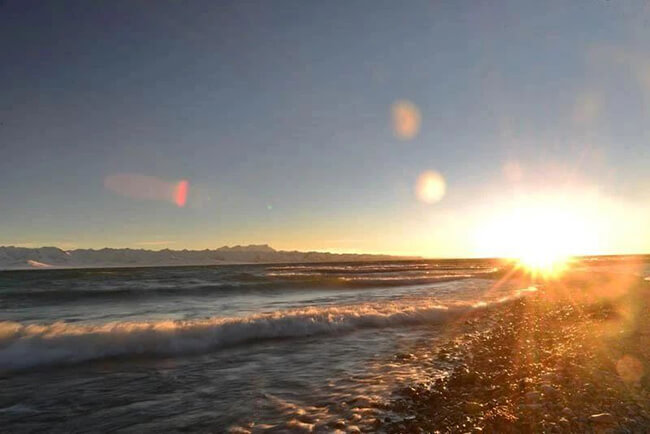
The key to taking perfect silhouettes is to keep it simple and clean. This means avoiding placing too many elements in the outline that would distract the viewer. The beach is a very popular location for silhouette photography because there are many open areas in the background. To reduce the area of the background, a telephoto lens can be used; the narrow angle of view makes it easier to separate the subject from a clean background.
1. Conditions for Shooting Silhouettes
(1) Need for Light:
Backlit environments or environments with a large light difference, where there is a significant contrast between bright and dark areas, can form silhouettes. For example, early morning or evening.
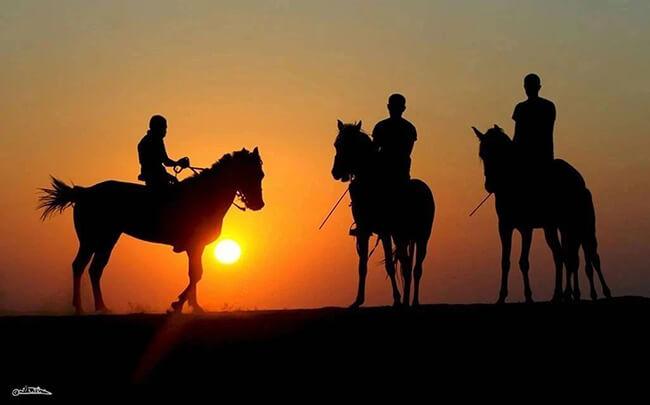
Backlight shooting: Let the light source (such as the sun, street lamps, neon lights) be behind the subject, with the front of the subject facing the camera, creating a natural contrast between light and dark.
- Natural light: Low-angle sunlight 30 minutes before sunrise/sunset (golden hour), with soft light, warm color temperature, and rich background colors.
- Artificial light: Window light, stage spotlights, or flashlights (placed behind the subject).
Key point: The light source should face the lens directly and be much brighter than the subject.
(2) Subject Selection
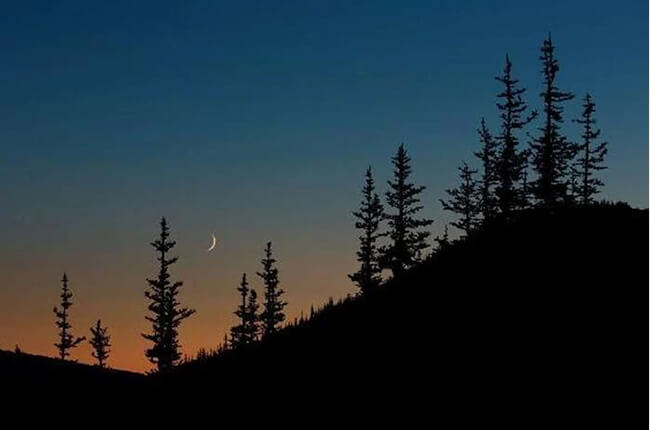
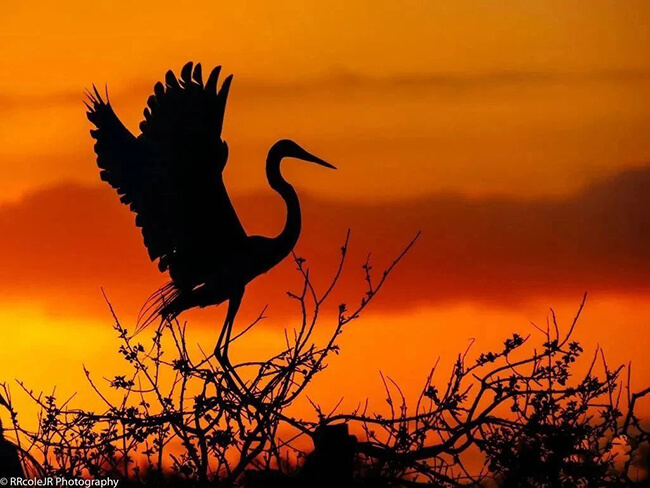
- Clear and recognizable outlines (such as profile portraits, tree branches, building silhouettes).
- Avoid objects with complex details or overlaps (for example: messy hair may blur into a mass).
- A clean, bright, and simple background to highlight the subject is a necessary condition for shooting silhouettes. If the background is cluttered, the overall picture will be chaotic.
Choose an open sky, water surface, or a solid-color bright background to ensure a strong contrast with the subject.
(3) Correct Camera Position
The shooting position is opposite to the light, that is, a backlit position, which easily creates a silhouette effect and better shows the charm of the outline of a person or subject.
(4) Shooting Posture
When shooting portrait silhouettes, the posture is somewhat particular and should have body language; for landscapes, avoid large areas of dead black and the display of details without light-dark contrast.
(5) Correct Focus
When shooting silhouettes, details cannot be seen clearly, but the subject must be clear. Blurred images should not affect the viewing experience.
2. Camera Settings
When shooting silhouettes, it is necessary to have the backlit background exposed normally and the subject underexposed to form a silhouette. For exposure, follow the principle of It's better to underexpose than overexpose. (it's better to underexpose than overexpose) and measure the exposure based on the background.
Aperture: Small aperture (f/8~f/16) to enhance sharpness.
ISO: The lowest value (such as ISO 100) to reduce noise.
Shutter: Adjust according to the background brightness (usually faster).
(1) Using Aperture Priority Mode (Av mode), Small Aperture + Spot Metering + Exposure Compensation
- Set the camera to aperture priority (AV) mode, using a small aperture of f/5.6 or smaller. This depends on the depth of field needed to express the scene.
- Use spot metering mode to measure the light on the medium gray clouds in the middle of the picture or aim the spot metering mode at the highlight area, then press the AE-L/AF-L button to lock the exposure, and then compose, focus, and shoot. Use a single focus point and set the "cloudy" white balance to enhance the warm color of the sun.
If using evaluative metering or center-weighted metering, the resulting silhouette will be brighter. It is necessary to use spot metering on the background to ensure normal exposure of the background and underexposure of the subject.
- Exposure compensation: In automatic exposure modes (program mode, aperture priority mode, or shutter priority mode), the picture is often too bright. To darken the image, exposure compensation can be used.
Reduce the exposure compensation (-1EV to -3EV) to make the subject completely black.
(2) Manual Exposure Mode (M mode): Small Aperture + Adjust Shutter + Screen Viewfinder
You can check the exposure indicator and adjust the camera settings so that the exposure indicator is at -1 or -2 (underexposure) instead of 0. Different silhouettes have different styles, and the same applies to exposure. Manual exposure mode has the greatest control, and you can adjust the settings according to your own needs and preferences to make the photo brighter or darker. For more convenient viewing of the exposure of the picture, it is recommended to use the screen viewfinder instead of always looking through the viewfinder. In addition, if the camera has an overexposure or underexposure prompt function, it can be turned on. This can better judge whether the subject is underexposed.
(3) Preventing Lens Flare
Flare is the visible light spot in the photo formed by the diffusion and reflection of light entering the lens between the lenses. In addition, if after shooting, the photo is found to be relatively bright but has a foggy feeling, it is basically caused by lens flare.
Lens flare directly affects the quality of the photo, so the following measures should be taken to avoid flare in the photo during shooting:
- Change the composition to avoid direct light entering the lens. Since lens flare occurs when shooting with backlight or side-backlight, it can be controlled by changing the shooting angle and position.
- Install a suitable lens hood for the lens.
- Avoid using the wide-angle end of the lens for shooting, because the wide-angle end is more likely to produce lens flare.
- Adjust the aperture, because different apertures have different anti-flare effects, so you can try shooting with different apertures.
(4) Turn Off the Flash to Avoid Brightening the Subject and Ruining the Silhouette Effect
3. Suitable Shooting Scenes
(1) Backlit Background with Brightness, Distinct Contrast, and Highlighted Texture
Choosing backlight shooting is the key to taking good silhouettes, presenting the effect of a bright background and a dark subject with distinct contrast.

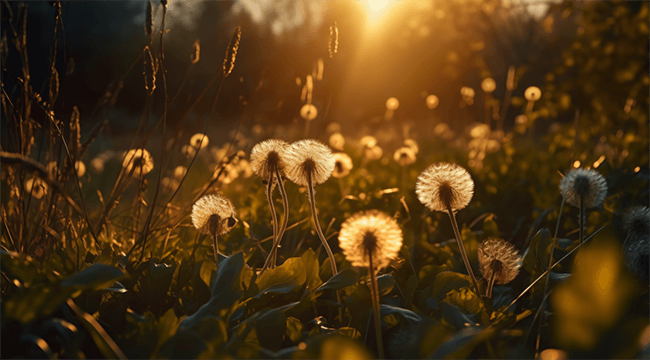
Shooting translucent objects (petals, leaves, human hair, etc.) against the light can show the texture of the object's outline and highlight details.
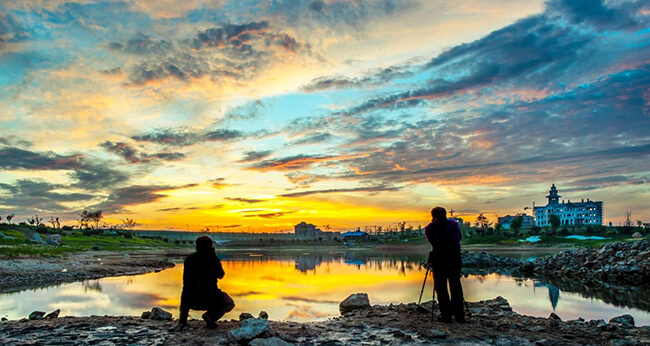
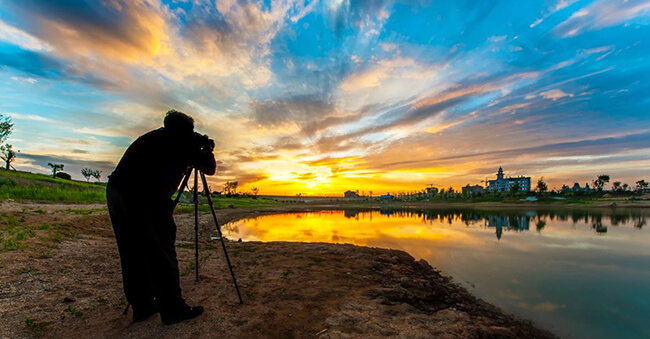
(2) Choose the Right Time, Golden Hour Light is the Most Beautiful
On good weather days, early morning or dusk, the light angle is low, relatively soft, and there is less reflected light and stray light.
Usually, the best time to shoot silhouettes is about 20-30 minutes before sunrise or sunset.

The sky at sunrise and sunset presents rich and changeable colors, adding visual impact and artistry to silhouette photos, making them more vivid and attractive.
(3) Beautiful Subject Outline, the Subject Should Have Obvious Lines and Clear Outline
Choosing a subject with obvious outline lines and unique shape can make the silhouette more distinctive and easier for the audience to recognize.
When taking portraits, you can choose to shoot from the side to make the outline clearer.

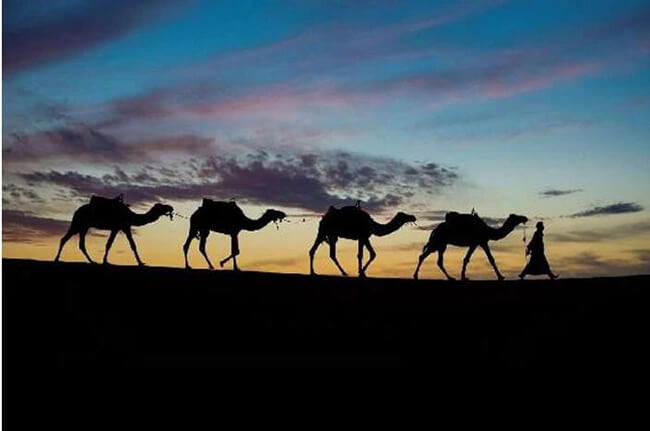
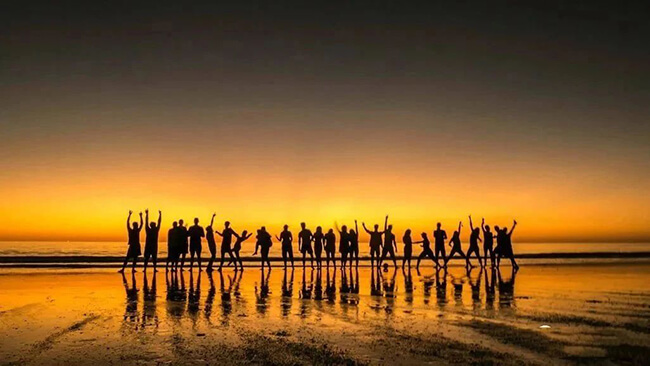
The subject should focus on exaggeration and avoid overlapping, so that the audience can immediately know what the subject is and what it is doing. For example, when shooting a person, the model should spread out his limbs instead of huddling up to better show the outline of the person.
(4) Lower the Exposure, Focus on the Subject, and Reduce Exposure

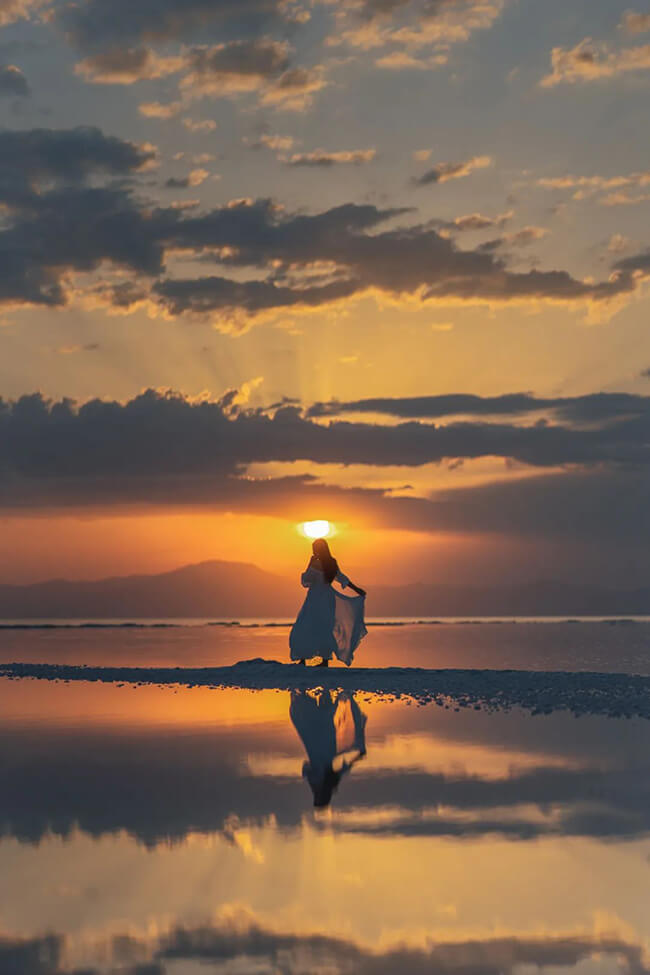
(5) Silhouette Reflections
Water surfaces, glass surfaces, wet (reflective) roads, ice surfaces... can all capture silhouette reflections. When taking photos, try to get as close to the water surface as possible to capture the beautiful scene where the real scene and the reflection are joined together.
(6) Using Different Perspectives
Low-angle shooting from below or at eye level can, on the one hand, leave more blank space in the picture to highlight the subject; on the other hand, highlight the lines of the person.
(7) Looking for Artificial Light Sources
Even if it is not natural light, sometimes, under bright backlight conditions, the subject seen by the naked eye is good, but the final shot is a silhouette. The fundamental reason for this gap is that the light-gathering methods of the camera and the human eye are very different.
4. Creative Skills
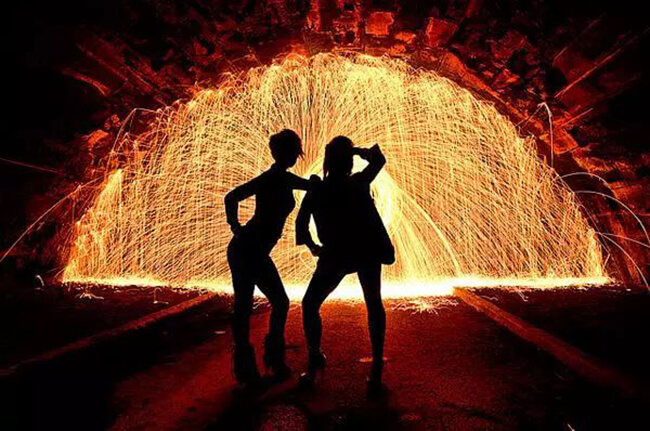
- Dynamic silhouettes: Shoot actions such as jumping and dancing to capture the tension of the body.
- Scenery borrowing composition: Use doors, windows, frames, or gaps between branches to form a silhouette within a silhouette.
- Multiple silhouettes: Combine the outlines of multiple people or objects into interesting graphics (for example: a couple holding hands).
- Color rendering: Retain the orange-red color of the sunset or the blue-purple color of the sky to enhance the atmosphere.
- Minimalist blank space: Leave a large proportion of bright background to highlight the outline of a small subject.
5. Solutions to Common Problems
- Problem: The subject is not dark enough with too many details.
- Cause: Insufficient exposure compensation or incorrect metering.
- Solution: Reduce exposure compensation and meter on the bright part of the background.
- Problem: The background is overexposed to white with no details.
- Cause: Shutter speed is too slow or aperture is too large.
- Solution: Speed up the shutter, narrow the aperture, or use a neutral density filter (ND filter) to reduce light intake.
- Problem: The subject's outline is blurred.
- Cause: Incorrect focusing or subject movement.
- Solution: Manually focus on the edge of the subject, or use a high-speed shutter to freeze the action.
6. Key Points for Mobile Phone Shooting
- Click on the bright part of the screen and pull down the "little sun" icon to reduce exposure.
- Directly use the mobile phone's "portrait mode" or "backlight mode"; some models will automatically optimize the silhouette effect.
- Use professional mode:
- Turn on "spot metering", aim at the bright part of the background to meter, and let the subject automatically underexpose.
- Reduce "exposure compensation (EV)": usually adjust to -1 to -2 to enhance the silhouette effect (adjust according to the light conditions).
- Lower ISO and exposure value.
- When backlit, use an object to block part of the lens to reduce flare (simulating the effect of a lens hood).
Related Tags: Photography experience How to Take Silhouette Photos