I. Front Light: The "Safe Bet" for Basic Lighting
Light Characteristics: The light source shines directly on the subject from behind the photographer, resulting in even illumination on the subject, minimal shadows, and high color reproduction.
Suitable Scenes: Landscapes, portraits (for soft skin texture), still life (to emphasize colors).
Shooting Tips:
1. Exposure Control: Cameras easily achieve accurate exposure in front light. Try "reducing exposure compensation by 0.3-0.7 stops" to prevent over-brightness that loses details (e.g., snow scenes, white objects).
2. Avoid Flatness: Front light may make the subject lack three-dimensionality. Enhance visual tension through color contrast (e.g., red flowers with green leaves), compositional layers (blurred foreground), or textural details (e.g., tree bark, fabrics).
3. Mobile Shooting Tip: Enable "HDR" mode to suppress highlights and brighten shadows, avoiding overexposure of the sky or underexposure of the subject.
Example: When shooting flowers, front light clearly reveals petal textures and colors, but use a macro lens or close-up composition to highlight details and prevent an empty frame.
II. Side Light: The "Light and Shadow Magic" for Shaping Three-Dimensionality

Light Characteristics: The light source illuminates from 45°-90° to the left or right of the subject, creating distinct light-dark contrast and highlighting contours and textures.
Suitable Scenes: Portraits (to emphasize facial contours), architecture (line texture), still life (metallic/rough surfaces).
Shooting Tips:
1. Control Light Ratio: Excessive light ratio causes loss of shadow details. Use a reflector for fill light (silver side enhances brightness, white side softens light) or set "exposure compensation +0.3 stops" to brighten shadows.
2. Focus and Metering: Focus on the light-dark boundary, use "spot metering" on the subject’s bright areas to prevent the camera from misjudging exposure due to large dark areas.
3. Creative Use: For side-light portraits, have the model turn their face toward the light source; shadows will outline the nose bridge and jawline. For architecture, side light emphasizes brick textures on walls or layered reflections on glass.
Example: When shooting a portrait, side light illuminates 1/3 of the model’s face from the right, leaving the left in shadow. A low-angle shot creates a dramatic, cinematic atmosphere.
III. Backlight: The "Atmosphere Enhancer" for Outlining Contours
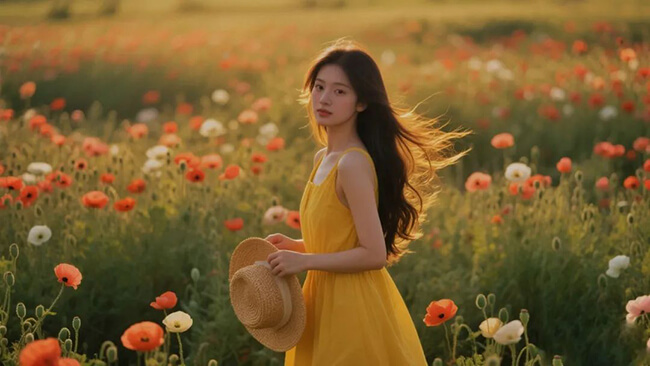
Light Characteristics: The light source shines from behind the subject, creating a bright edge around the subject. The background is high-lit, and halos easily form.
Suitable Scenes: Silhouettes, portrait hair light, landscapes (sunrise/sunset), artistic creation.
Shooting Tips:
1. Avoid Glare: Use a lens hood, block light at the lens edge with your hand/object, or adjust the angle to keep the light source off-center.
2. Metering and Focus: For silhouettes, use "spot metering" on bright background areas, manually reduce exposure compensation by 1-2 stops to turn the subject into a pure black outline. For backlit portraits, focus on the subject’s edges (e.g., hair) and enable "backlight compensation" (common in mobile cameras).
3. Utilize Halos: Intentionally let the light source enter a corner of the frame to create hazy starbursts or circular halos (narrow aperture to f/8-f/16 for a dreamy effect).
Example: Shoot a person’s back at sunset, with the sun behind their shoulder. Focus on their hair, reduce exposure compensation—the hair will glow golden, contrasting sharply with the sunset sky and the person’s silhouette.
IV. Top Light: The "Noon Light" with Challenges and Creativity
Light Characteristics: The light source shines directly from above the subject (e.g., noon sun), creating heavy shadows under features like eye sockets and nostrils.
Suitable Scenes: Low-angle architecture shots (to emphasize structure), product photography (even studio top light), creative portraits (dramatic shadows).
Shooting Tips:
1. Reduce Shadows: For outdoor top-light portraits, use a softbox or white sheet to soften light, or have the model tilt their chin up. Shoot from a low angle with the sky as background to avoid ground shadows.
2. Studio Use: Indoor top light, often with softboxes, works for jewelry and cosmetics needing even illumination. Pair with side reflectors to eliminate bottom shadows.
3. Creative Use: Intentionally retain the top light shadows to create a "mysterious" or "cold" vibe. For villains or suspense themes, top-light nose shadows enhance facial tension.
Example: Shooting a building’s dome at noon, top light clearly reveals carving details. A wide-angle low-angle shot makes lines converge upward, enhancing spatial depth.
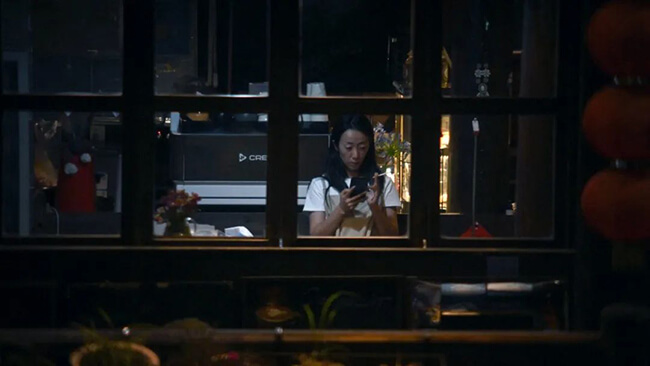
V. Low Light: The "Battle of High Sensitivity and Stability" for Capturing Atmosphere
Light Characteristics: Insufficient light (e.g., night, indoor lighting) requires higher camera settings for exposure, often causing noise or blurriness.
Suitable Scenes: Night scenes, indoor portraits, starry skies, light trail photography.
Shooting Tips:
1. Triple Parameter Adjustment:
- Aperture: Use a large-aperture lens (f/1.8-f/2.8) to increase light intake; shallow depth of field blurs backgrounds (ideal for portraits).
- Shutter Speed: Avoid speeds slower than the "safe shutter" (e.g., ≥1/50s for 50mm focal length). Use a tripod for static subjects (e.g., night scenes).
- ISO: Prioritize adjusting aperture and shutter, then increase ISO (keep camera ISO ≤3200, mobile ISO ≤1600) to avoid excessive noise.
2. Use Ambient Light: In low light, use streetlights, neon, or candlelight as main light sources. Pair with slow shutter (e.g., 1/10s) for dynamic portraits, or long exposure (≥30s) for car light trails.
3. Mobile Low-Light Tips: Enable "night mode" (phones automatically merge photos to reduce noise) or use "pro mode" to manually set ISO and shutter. For starry skies, use a tripod with ISO 3200, 20s shutter, and focus at infinity.
Example: Shooting indoor candlelit portraits with only candlelight: set aperture to f/2.0, ISO 800, shutter 1/60s. Focus on the face—the dark background retains warm candlelight ambiance, while avoiding blurriness.
Conclusion: Light is the "Brush" of Photography
No lighting condition is inherently good or bad; the key is understanding its traits and using it flexibly. Front light for "stability," side light for "shape," backlight for "mood," top light for "variation," and low light for "atmosphere." Beginners can start by observing daily light changes, practicing frequently, and mastering the balance of exposure, fill light, and composition. Once you "see" light, you’ve taken the first step in advancing your photography skills.
Related Tags: Photography experience