When learning photography, you must have heard that M mode is relatively "advanced". Maybe you’ve tried it a few times but couldn’t even get a properly exposed shot. In fact, M mode isn’t all that magical. The shooting parameters still boil down to three, and it doesn’t necessarily produce particularly special effects. This article explains how to effectively use M mode in practice; plus, what is Auto ISO? And why enabling it in M mode is especially helpful.
Why Use M Mode?
To understand M mode, you first need to know why you’d want to control both aperture and shutter at the same time. This relates to the "three elements of exposure".
- Aperture controls depth of field—you’re probably already aware of this, and it’s easy to experiment with by adjusting aperture sizes while shooting. For details, I have an article on imaging principles.
- Using a relatively slow shutter speed allows more light to be captured, reducing image noise. In fact, the brightness of light captured by a single pixel is proportional to the square of (1/f-stop) and proportional to shutter time (it has no direct relationship with ISO, focal length, or object distance)—I covered this in another article. However, in actual shooting, an excessively slow shutter can cause blurring due to camera movement or subject movement. The movement within the shutter time must be smaller than the minimum acceptable size.
- ISO is just a gain that converts light brightness into numerical values; it doesn’t affect the actual brightness of the collected light. High ISO isn’t the source of noise. Instead, low received light brightness inherently contains noise, and increasing ISO to ensure proper exposure simply makes that noise visible. So, even shooting at a slightly lower ISO isn’t entirely impossible. It’s just that when reviewing, you won’t see the effect immediately, and the histogram will be squeezed to the left.
The Process of Using M Mode
In M mode, you control aperture, shutter speed, and ISO simultaneously. The camera can only indicate whether the exposure combination is appropriate but can’t force changes to any parameter. The first two parameters have higher priority—determine them first, then adjust ISO to ensure proper exposure. Therefore, when using M mode, you generally don’t need to adjust exposure compensation; just check where the metering bar is. Of course, what counts as "proper exposure" relates to the camera’s metering mode, which I’ll expand on another time.
Using M mode is actually a process of determining parameters, with no universal formula to memorize. When encountering a scene, ask yourself these questions in order:
1. Is aperture or shutter more important? (For example, a large depth of field requires a small aperture, such as f/8.)
2. What value should the remaining parameter (between aperture and shutter) be? (For example, when shooting handheld with a 28mm focal length, a shutter speed of 1/50s is acceptable.)
3. Then adjust ISO to achieve proper exposure.
4. If ISO is set to its minimum and exposure is still incorrect, you’ll have to compromise on the previous parameter. If that still doesn’t work, go back to the first parameter.
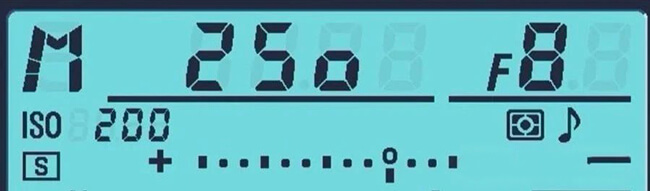
For example, in the image below, with f/8 and a shutter speed of 1/50s, the ISO is already at its minimum but overexposure occurs. Speeding up the shutter to 1/250s might fix it.
ISO 200, shutter 1/50s: severe overexposure 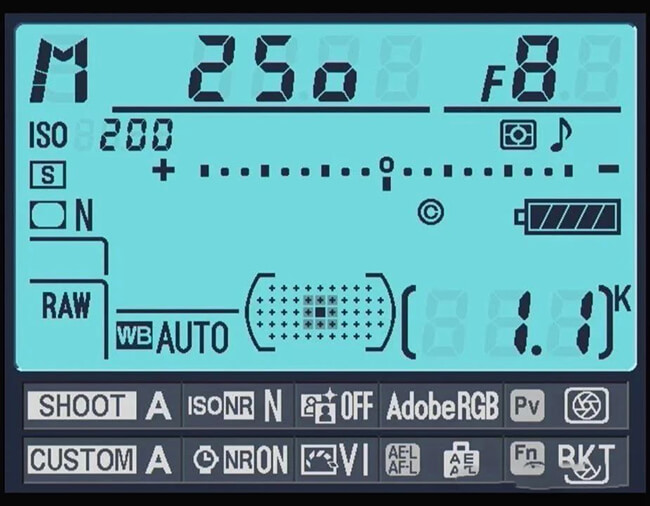
Adjusted to shutter 1/250s: metering bar in the middle 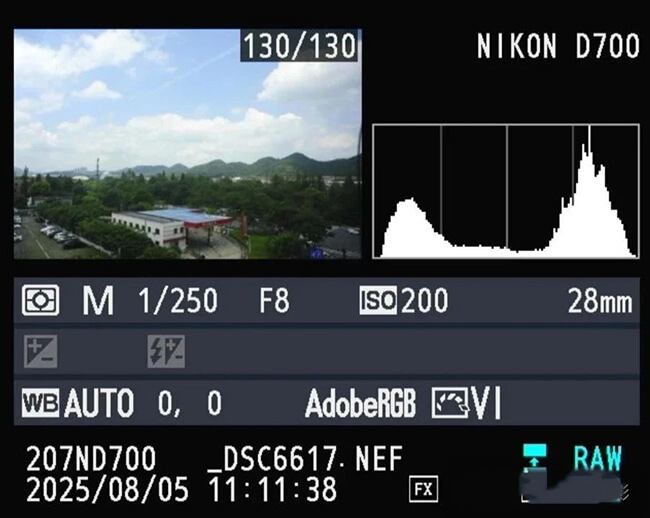
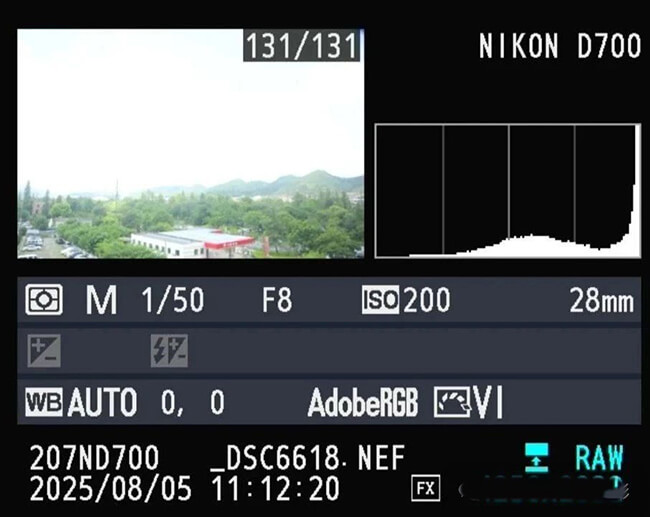
Shutter 1/250s: resulting shot
Another example: When shooting a moving child, first set the aperture to f/4.5 to retain some background details. Then, for the shutter—if the child is running around, even 1/500s might not be enough (regardless of whether focus is accurate), and the ISO will have to be relatively high in this case.
Another example: For night portraits with an f/1.8 lens, you might let the model stay still, allowing a shutter speed of 1/25s (you’ll need to take multiple shots and pick the one with the least movement). Then check the ISO—whether it’s 4000 or 6400, it might still not be enough.
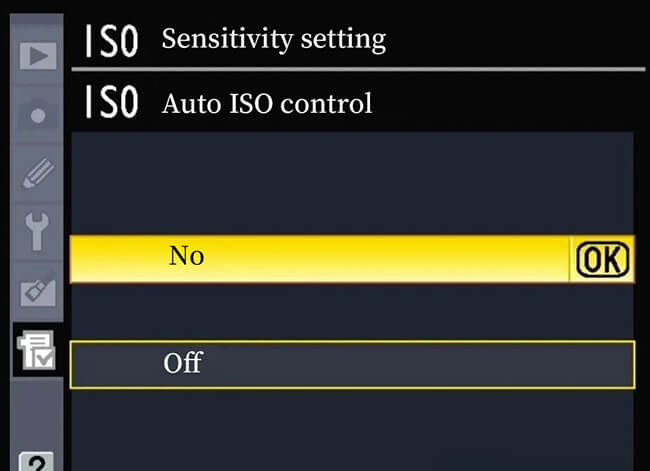
Auto ISO
If you have to adjust all three parameters in M mode, it can slow down your shooting and cause you to miss moments. ISO is the least critical parameter here; as long as it’s roughly correct, you can adjust it later in post-processing. Enabling Auto ISO means exposure will be acceptable most of the time. However, you still need to pay attention to the metering bar and the actual ISO. On one hand, if you compromise a little, you can collect more light, keep ISO lower, and reduce noise. On the other hand, if ISO hits its maximum or minimum, exposure will still be incorrect, and you’ll have to adjust the first two parameters to keep ISO within its range.
For example, in the scene above, if you continue to reduce the aperture and speed up the shutter, ISO will automatically increase (ISO displays as red 360). 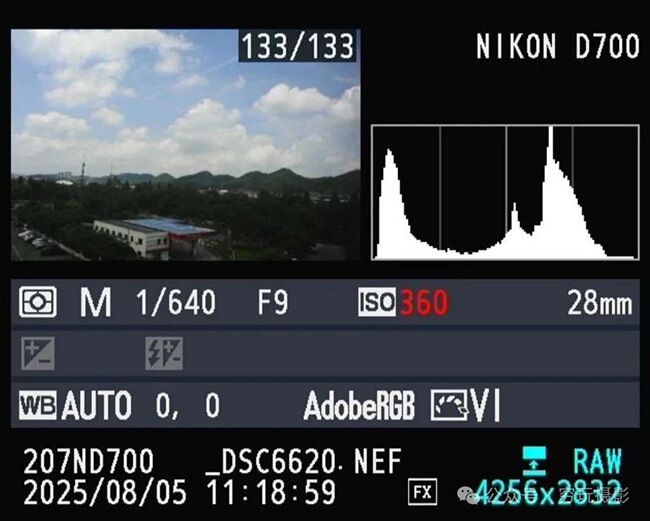
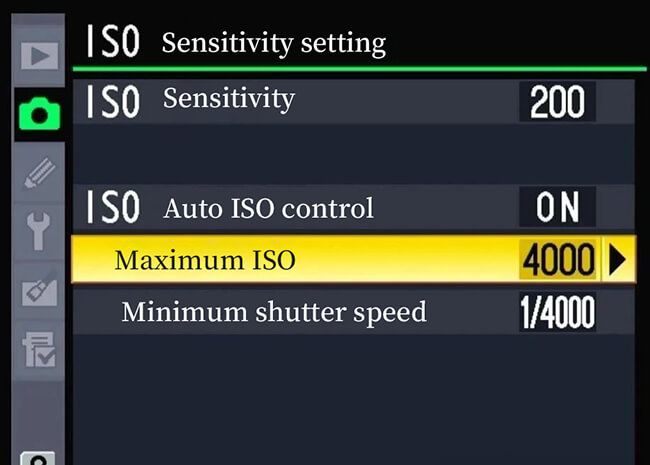
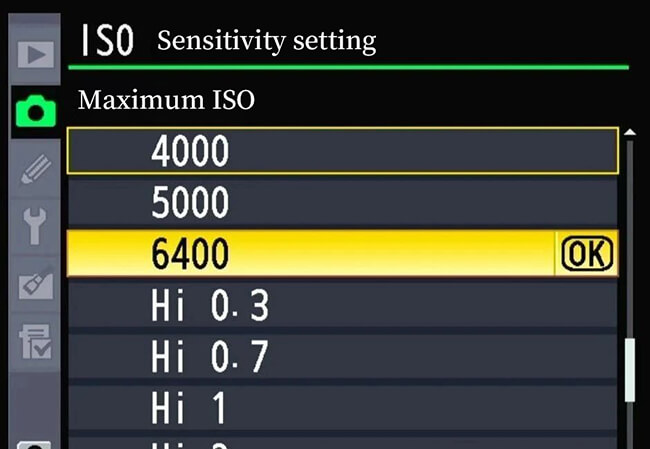
If Auto ISO is enabled, you can set a maximum ISO for auto mode. Based on your tolerance for noise, you can set it lower than the camera’s maximum. For example, set it to ISO 4000 instead of 6400.
Conclusion: M mode doesn’t guarantee great photos—the actual parameters are what matter. If the parameters set in M mode happen to be the same as those in A mode or S mode, the resulting photos will be identical. Most of the before-and-after comparison photos online claiming to demonstrate M mode skills are actually edited in post-processing. However, this doesn’t mean you should avoid M mode entirely. Use it when you need to control both aperture and shutter simultaneously. Enabling Auto ISO in such cases is fine, and having one fewer parameter to adjust makes operation easier.
Related Tags: Experience in using cameras