1. Keep the Composition Simple
The true essence of photography is often simple: a good photo only needs one main subject.

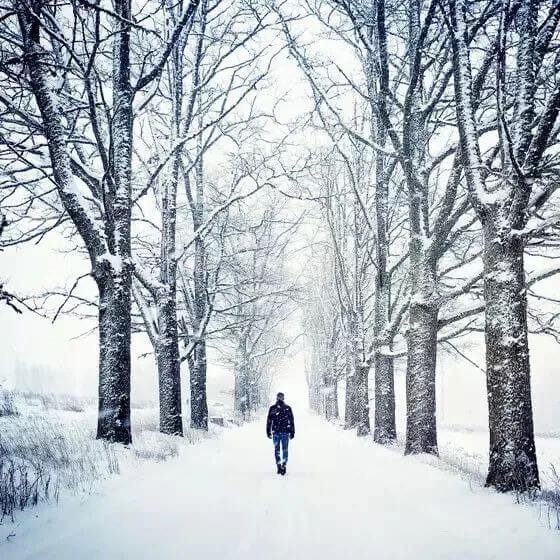
Don’t be afraid of large areas of blank space around the subject. Try minimalist composition: a single, prominent subject against a large, uniform, and clean background.
2. Shoot from a Low Angle (Upward)
If you always shoot from an ordinary person’s perspective, how can you stand out? Just make your shooting angle unique!
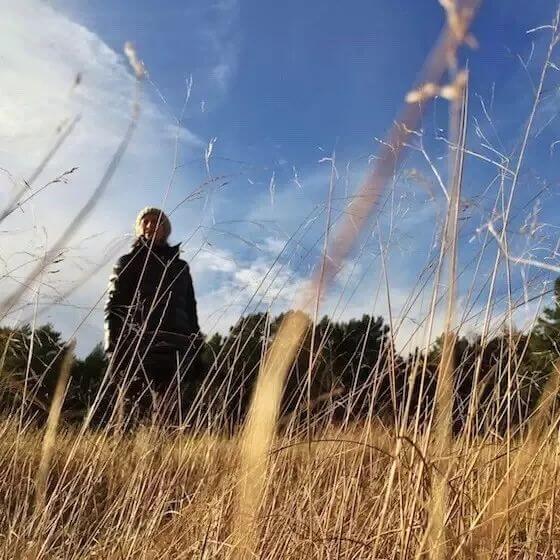
Shooting from a low angle has three major advantages:
- The unique perspective is rare, bringing a fresh visual experience.
- When shooting upward, the pure sky serves as the background, eliminating the hassle of avoiding cluttered backgrounds.
- It allows inclusion of foreground elements near the ground, effectively enhancing the layering of the image.

3. Create Depth
There are several practical and effective shooting techniques: Use leading lines. Look for clear lines in the scene that extend from near to far, such as road markings, railroad tracks, guardrails, or coastlines.

Include foreground elements: Use the foreground as a reference subject to create a sense of depth; natural objects like distinct flowers, plants, or rocks are easy to find in outdoor photography.

It’s even better if you can create three clear layers in the composition—foreground, midground, and background. Skillfully use frame-like foreground elements to focus on the midground subject while blurring the distant background.

4. Diagonal Alignment
When there are multiple subjects in the frame, use diagonal alignment to arrange the composition. If all elements cluster too much on one side, it’s easy to cause visual imbalance.

When shooting still life or portraits, place objects and people at opposite ends of the frame’s diagonal to achieve a balanced visual weight.
 If the objects being photographed can’t be moved, adjust the shooting angle by moving your position to balance the frame.

5. Close-Ups
Turn on your camera’s macro mode to take close-ups of flowers, leaves, water droplets, etc.

Get close to the subject and move slowly to find the closest distance where the camera can focus clearly. It’s recommended to use an external close-up lens for better results.
Additionally, try taking close-ups of people’s or animals’ faces.

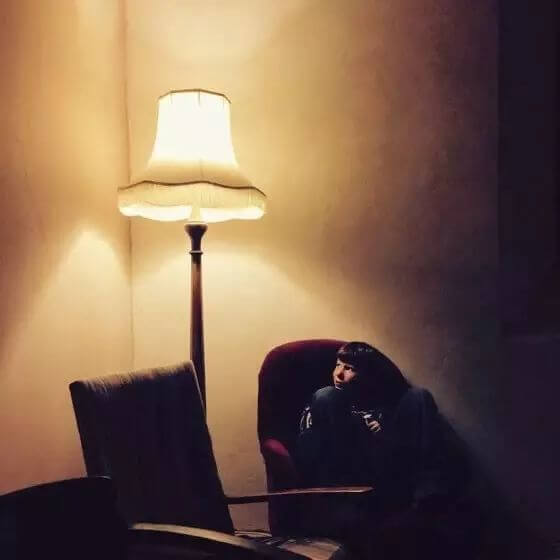
6. Capture Shadows
When light hits at a low angle, you can capture elongated shadows of objects. Including shadows in the frame adds an interesting element to the scene.
 Light and shadow can highlight the three-dimensional outline of objects and create a mysterious atmosphere. Elongated shadows require low-angle light—shortly after sunrise or before sunset, during the golden hour, when the light is soft, is the best time to shoot.
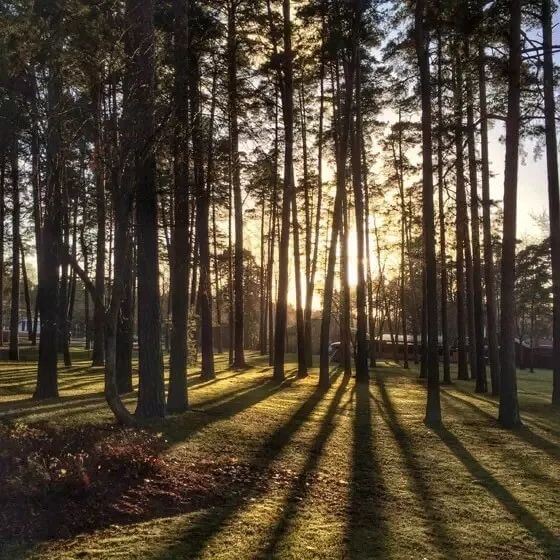
When both the subject and its shadow appear in the frame, shooting with side light or side-backlight will make the effect more striking.

7. Capture Silhouettes
A high-contrast image with a bright background and a silhouetted subject is one of the easiest ways to achieve a cinematic look.

Choose objects or people with clear outlines and place them against a main light source or bright background. Adjust exposure settings to keep the subject dark,呈现 a pure silhouette.

For outdoor shooting, the golden hour of sunrise or sunset provides ideal gradient colors in the sky. Besides shooting near windows or doors with light, using large areas of strong ground reflections as the background is also a great choice.
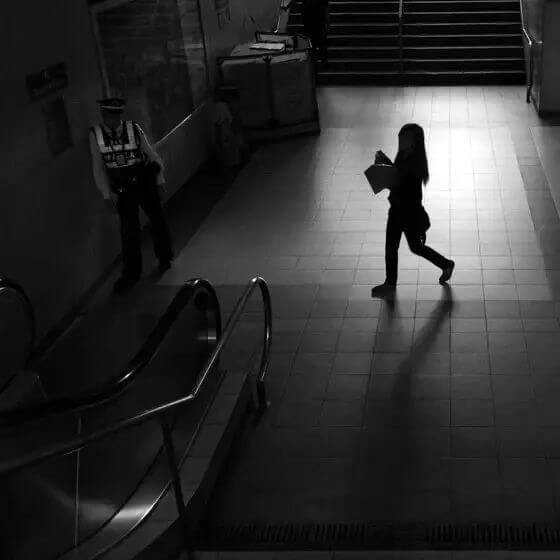
Set the focus and metering parameters in advance, then wait for the subject to move into the ideal position.
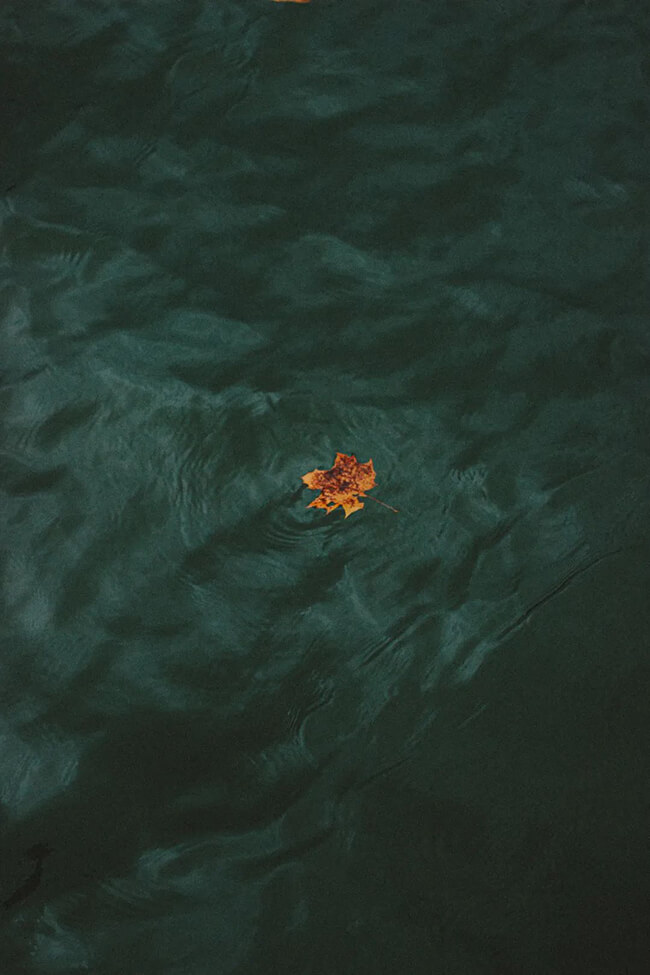
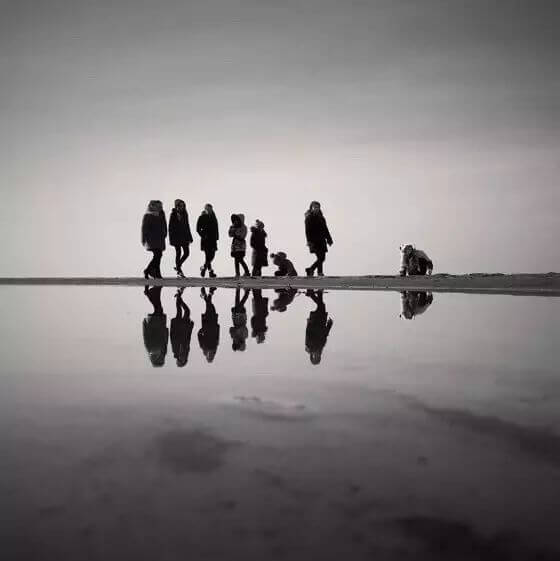
8. Reflections
Look for reflective surfaces like glass, water, ice, walls, or car bodies—capturing reflections is a great way to create unique shots.

Natural liquid surfaces (like water) often show richer texture variations compared to smooth man-made surfaces.
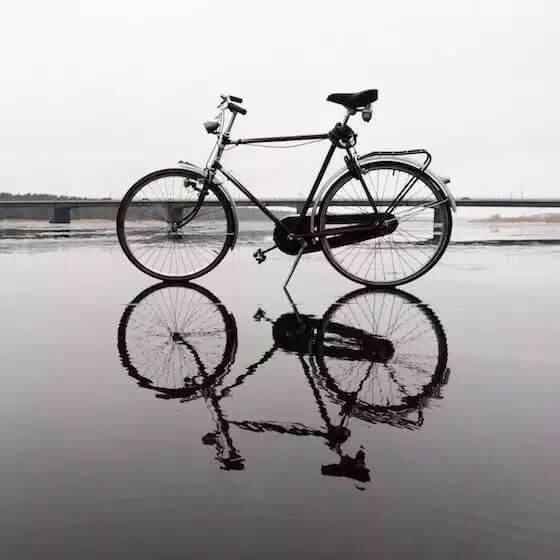
Getting close to the liquid surface will result in a larger proportion of the reflection in the frame.
9. Symmetrical Balance
Symmetrical composition creates a sense of balanced and stable visual tension, embodying the beauty of classical geometry and a comfortable, harmonious viewing experience.
Symmetrical composition is particularly good for showcasing the overall beauty of architecture, as architectural designs often use symmetry.

Symmetry doesn’t have to be rigid—it can be flexibly combined with other techniques like the rule of thirds or leading lines.
Related Tags: Experience in using cameras